Win 1894 safety removal
Forum rules
Welcome to the Leverguns.Com General Discussions Forum. This is a high-class place so act respectable. We discuss most anything here other than politics... politely.
Please post political post in the new Politics forum.
Welcome to the Leverguns.Com General Discussions Forum. This is a high-class place so act respectable. We discuss most anything here other than politics... politely.
Please post political post in the new Politics forum.
Win 1894 safety removal
Can the tang safety be removed from a Win 1894 AE trapper ? if so how ? Thanks
-
J Miller
- Member Emeritus
- Posts: 14906
- Joined: Sat Mar 31, 2007 7:46 pm
- Location: Not in IL no more ... :)
Re: Win 1894 safety removal
Yes.kooz wrote:Can the tang safety be removed from a Win 1894 AE trapper ? if so how ? Thanks
Remove the stock, then disassemble the safety components and remove them. You'll have to find something to fill the hole in the tang with.
There are several articles in the "ONE STICKY" link about this.
Joe
***Be sneaky, get closer, bust the cap on him when you can put the ball where it counts  .***
.***
-
Griff
- Posting leader...
- Posts: 21235
- Joined: Sat Mar 31, 2007 4:56 pm
- Location: OH MY GAWD they installed a STOP light!!!
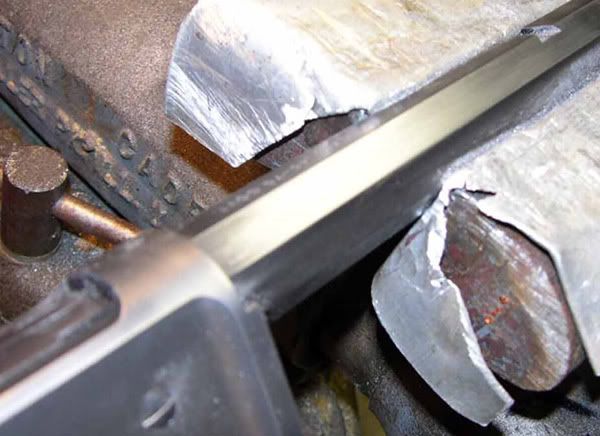
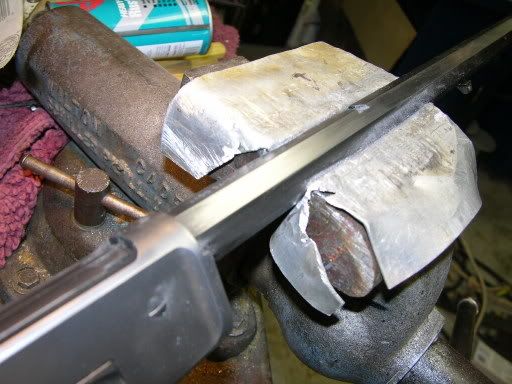
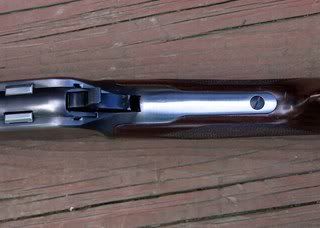
I don't think the '86 project was on the "1-sticky", so I did a Google search of the old site and only resulted in this one by Ken41, unfortunately the pics have been deleted from his photobucket, (I did a search over on the SASS Wire, but couldn't locate him, maybe he'll see and repost):

Here are pictures of the process of removing the markings on the current 1886 barrel and then re-rolling the original Winchester markings.
I tried the methoud that was mentioned about peening the letters, but found that it made no difference. Just using draw filing on the lettering works fine .
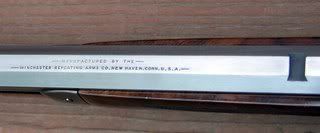
This photo shows starting the draw filing process. The filing should be extended past the lettering to make a nice blend-in with the rest of the barrel flat.

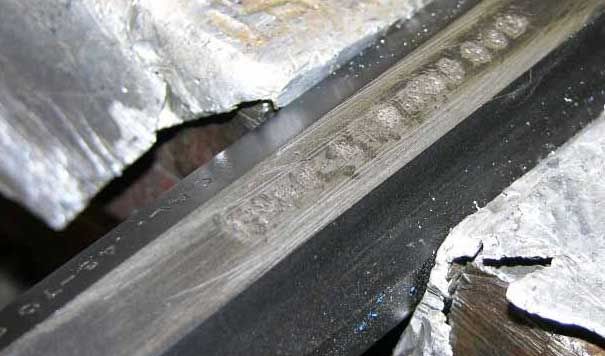
This is what the barrel looks like after the process is completed. I have not decided on what type of final finish to apply to the rifle, so I did not remove the barrel at this time. Notice that the draw filing is continued far past the original lettering to bend in nicely.

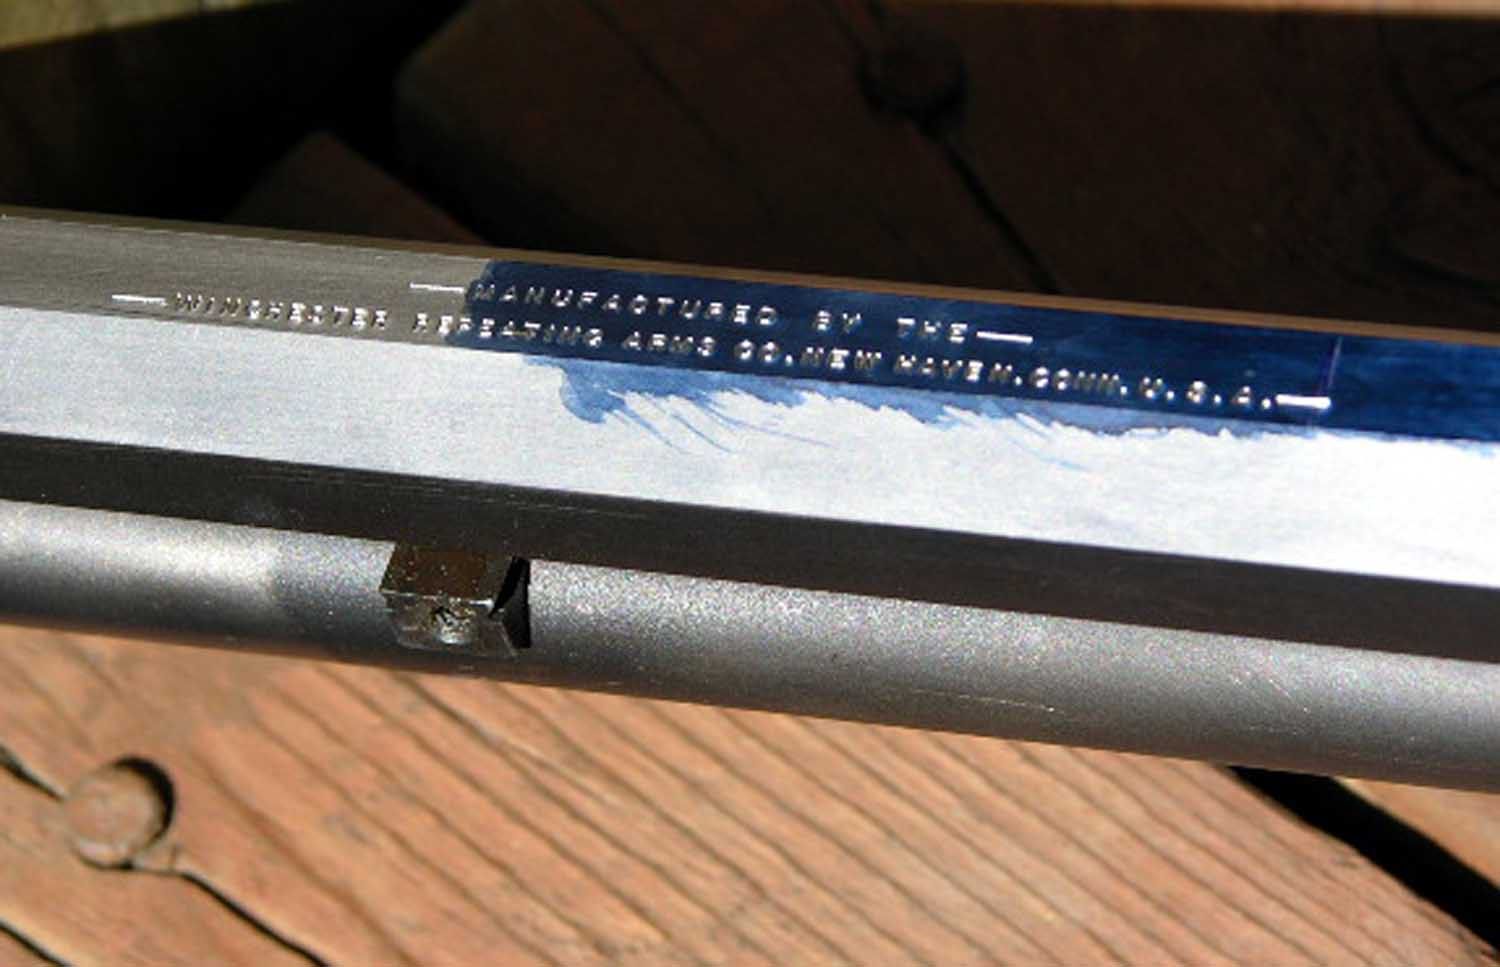
The final result. This is what Winchester should have done when the new 86's came out. If they had to have the other markings, they should do what Uberti does on some of its guns, put the rest on the bottom.

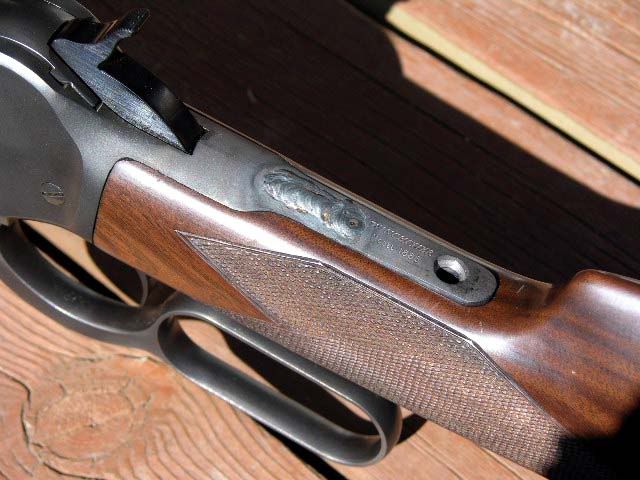
The tang was welded using TIG welding with a mild steel filler rod. I decided to remove the 1886 lettering, as it is not what was used. The original -Model of 1886- will be applied in the correct font.


I have not made a decision on the finish. I am leaning toward a worn
used finish that would look like a well used, but well maintained rifle. The high grade wood is seconds that I picked up a few years ago. I still have not comeup with an easy way to remove the original finish.
The roll markings were done by a friend Charlie Erb, who does restorations. His email is [url="mailto:"]cerb@bentcom.net[/url]
All comments and suggestions will be appreciated
Ken
NRA Life
SASS 48929
SW PA
Here are pictures of the process of removing the markings on the current 1886 barrel and then re-rolling the original Winchester markings.
I tried the methoud that was mentioned about peening the letters, but found that it made no difference. Just using draw filing on the lettering works fine .
This photo shows starting the draw filing process. The filing should be extended past the lettering to make a nice blend-in with the rest of the barrel flat.
This is what the barrel looks like after the process is completed. I have not decided on what type of final finish to apply to the rifle, so I did not remove the barrel at this time. Notice that the draw filing is continued far past the original lettering to bend in nicely.
The final result. This is what Winchester should have done when the new 86's came out. If they had to have the other markings, they should do what Uberti does on some of its guns, put the rest on the bottom.
The tang was welded using TIG welding with a mild steel filler rod. I decided to remove the 1886 lettering, as it is not what was used. The original -Model of 1886- will be applied in the correct font.
I have not made a decision on the finish. I am leaning toward a worn
used finish that would look like a well used, but well maintained rifle. The high grade wood is seconds that I picked up a few years ago. I still have not comeup with an easy way to remove the original finish.
The roll markings were done by a friend Charlie Erb, who does restorations. His email is [url="mailto:"]cerb@bentcom.net[/url]
All comments and suggestions will be appreciated
Ken
NRA Life
SASS 48929
SW PA
Griff,
SASS/CMSA #93
NRA Patron
GUSA #93
There is a fine line between hobby & obsession!
AND... I'm over it!!
No I ain't ready, but let's do it anyway!
SASS/CMSA #93
NRA Patron
GUSA #93
There is a fine line between hobby & obsession!
AND... I'm over it!!
No I ain't ready, but let's do it anyway!
1886 Tang Safety and barrel markinhs
I'll see if I can find the pictures and redo the link to Photo bucket.
Ken
NRA Life


NRA Life