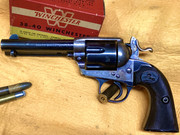
I built this giant silencer after seeing one here on the levergun forum, being used with a .45 muzzle loader and light loads. The cat will often snooze by the porch post while I'm shooting the .22


I thought I'd offer up my process and some dimensions. First you need a 12" sono-tube (carboard concrete form), and some scap plywood, 4 pieces of 3/4" x 1" (or there-abouts) x 48"pine, and some fiberglass insulation. Draw out 5 circles that are about 1/2" smaller than the inside diameter of the tube (this one is too small, but it didn't create any problems ultimately).


I made up my own compass by drilling a 1/4" hole for the pencil and using a #8 finish nail for the center point. I moved the nail location for changing the diameters.


The out side of all the circles are the same, the inside diameter changes in 1/2" diameter increments (note the 1/4" radius increments on my compass stick). 3.5", 4", 4.5", 5", 5.5"

as you are laying out the circles draw a cross hatch through the center. This will help with assembly.

Next layout the size of your 4 foot sticks at the end of each cross hatch line.
 .
.Then you have to cut out the cicles and the notches. I used a band saw, which is why you see a cut from the edge of the circle to the center. This extra cut did not cause any trouble.

you could also use a jig saw which lets you start the center hole from a 1/2" drilled hole.


remember to clamp you work firmly, there's no sense in cutting your trigger finger to save a few minutes.
When you have all the circle cut and notched, number them from smallest to largest so you're less likely to mix up the order.

Next layout the plywood thickness on each end of your four sticks, and then every 12" in between. You're shooting for 4 equal spaces.

Now you are ready to assemble. I used glue and 2" roofing nails. The effort is to not split the wood or mash your thumb.


Once you have the frame assembled then you start with the insulation. Use the thinnest (lowest R-value) and the paper-backed size meant for 24" stud bays. this width allows for cutting it in half for your 12" spaces. Cut pieces that are 12" x 37". Use a straight edge to compress the fiberglass and cut it with a razor knife.


once you have your 12" x 37" pieces, then layout lines every 9.25" and slice the paper. You should have three slices along the 37" length. Try not to slice through the fiberglass.

Then you stuff the fiberglass in between the plywood. Line up your 9.25" slices with the 48" sticks. and staple it onto your frame.

Then do it again

Don't hurry, you'll just make a mess.

The insulation will close up the center circle, so pack it out as you go. I used a sock as a gauntlet glove to keep from getting insulation on my arms.


Finally I used duct tape to neaten up my seams.


Your 1/2" smaller diameter plywood will now allow this over-stuffed sausage to slide easily into the cardboard tube. Once it's in anchor it with a couple more nails through the cardboard into your frame.
Your sight line through the middle of the tube should be mostly clear. some final packing of the insulation will accomplish this.


I finally made this stand from an old saw horse and my left over plywood, but I had it precariously stacked on my wood pile for a couple of weeks. You shoot into the big end. the small end goes toward the target.

Be careful to keep your sightline toward the top of the tube, you lose all the quieting effect when your bullet hits the plywood....