Browning 1886 Disassembly
Forum rules
Welcome to the Leverguns.Com General Discussions Forum. This is a high-class place so act respectable. We discuss most anything here other than politics... politely.
Please post political post in the new Politics forum.
Welcome to the Leverguns.Com General Discussions Forum. This is a high-class place so act respectable. We discuss most anything here other than politics... politely.
Please post political post in the new Politics forum.
Browning 1886 Disassembly
I am looking for details on the disassembly of a Browning 1886 rifle. I found a very nice detailed step by step on the cast bullets forum, but it is for a Winchester version with the safety and rebounding hammer. I am also looking for help and suggestions for smoothing this action. In particular smoothing the cartridge lift part of the stroke. Mine seems to hang up and requires a sharp snap at the bottom of the stroke to get the cartridge lifted into alignment with the chamber.
Always Drink Upstream From The Herd
Re: Browning 1886 Disassembly
Here you go 
Browning 1886 & Model 71 - Disassembly & Tune Up
I search the web for any information on disassembly procedures for the 1886 or Model 71 for that matter, seems to be some kind of taboo to take one of these apart.
I figured I would do it and share my experience and pictures for others that may want to tackle this job!
I practiced on my Puma 92 first, the little brother of the 1886 so I could get 100% familiar with the workings of the 92 action, it is similar and much simpler than the 1886, plus there is plenty of how too’s on the web for guidance. The nice thing about practicing is the slick action my 92 has now.
Great information on the 92 can be found at Marauders web site and I thank all that contributed to the information found there.
http://marauder.homestead.com/Rifles.html
This checklist was partially used on both the 92 and 1886.
http://marauder.homestead.com/files/Rossitune.htm
Here is the Puma 92 in .357 that so graciously donated itself to the cause.
Well lets get started!
By the way, MAKE SURE THE GUN IS UNLOADED.
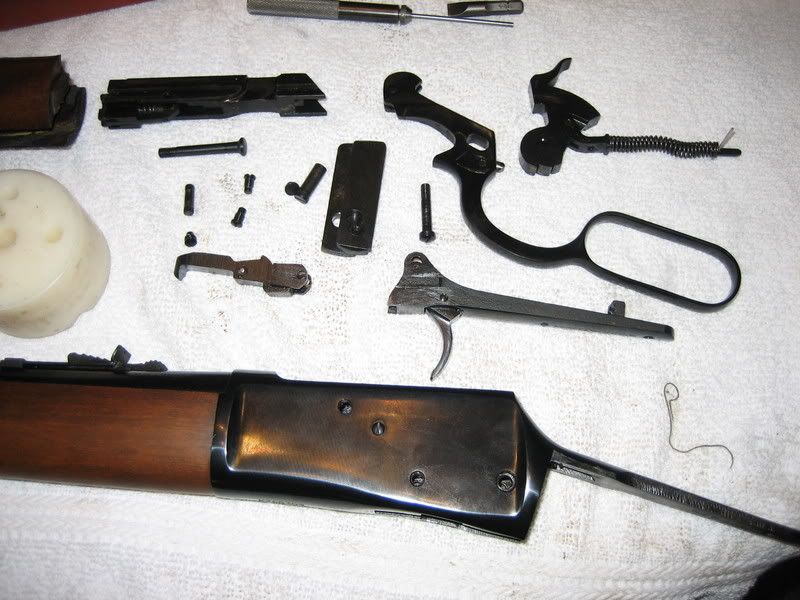
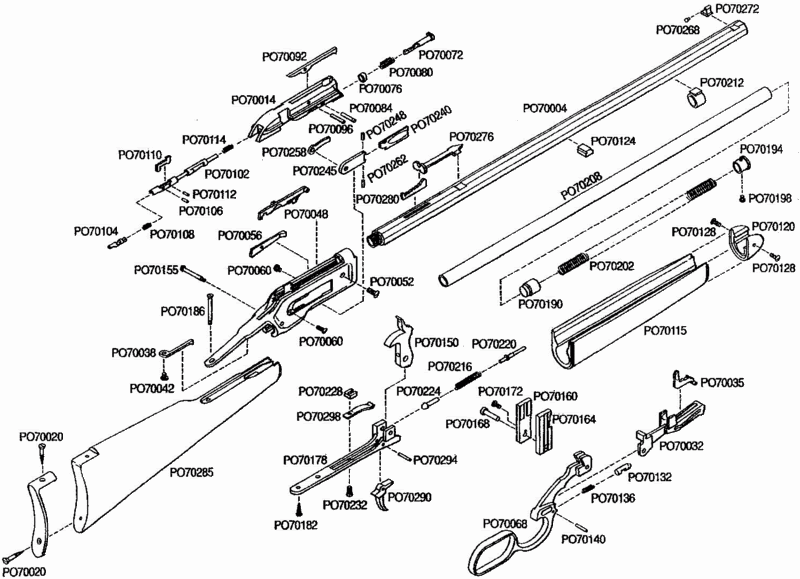
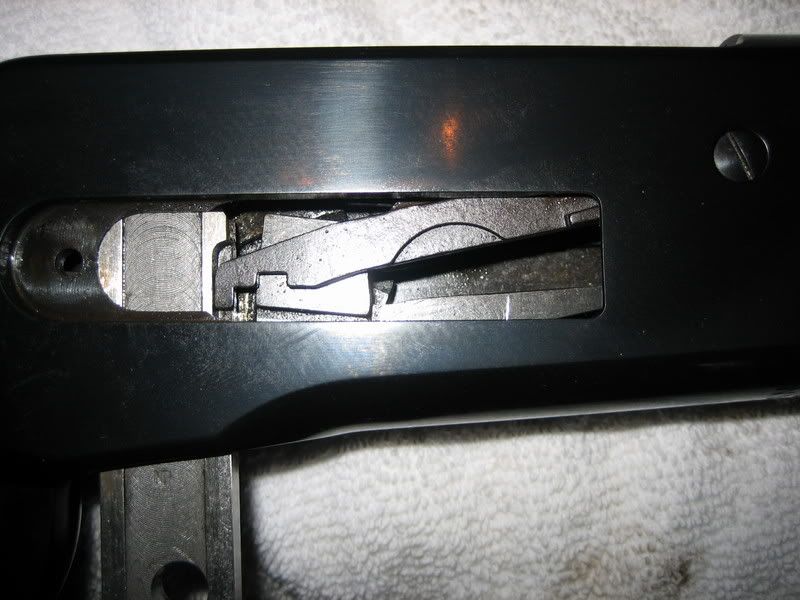
Study the diagram and get familiar with the workings. I will be referring to the part numbers when needed.
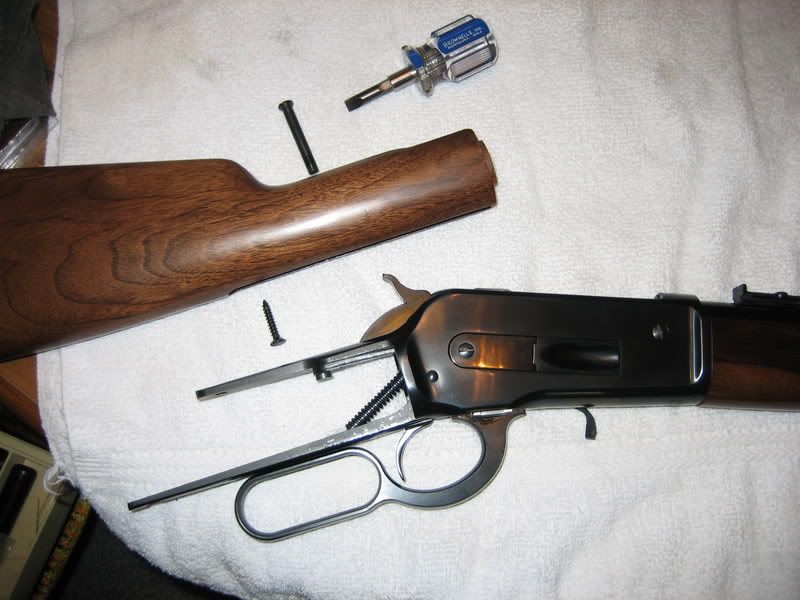
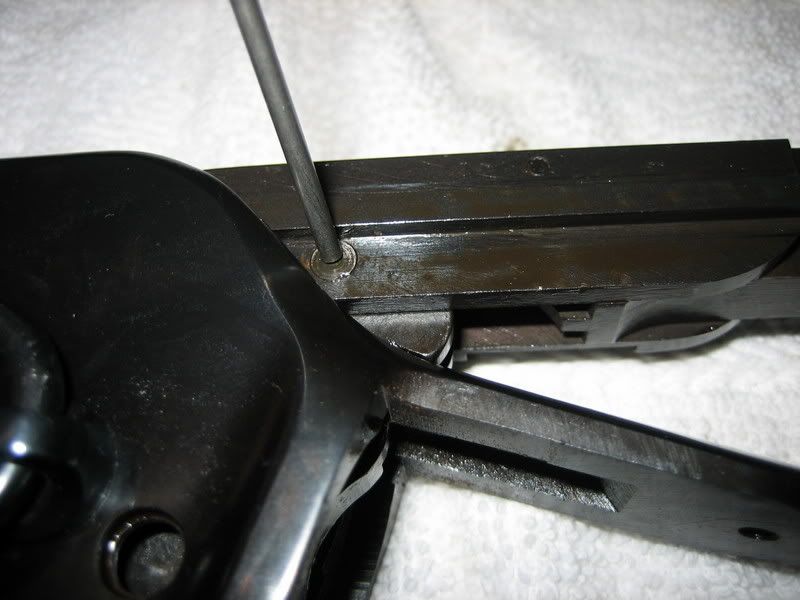
Remove the butt stock by removing the upper and lower tang screws, then slide the stock off to the rear.
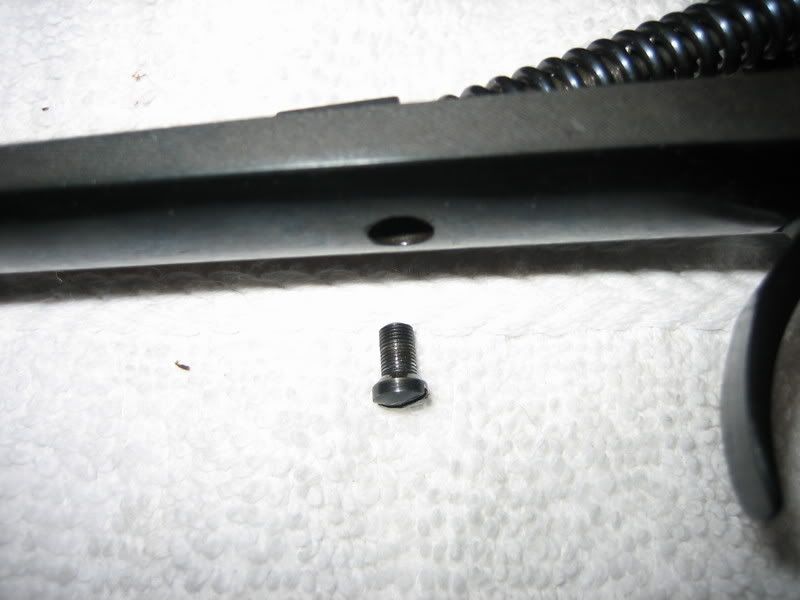
Remove the loading gate spring cover and screw.

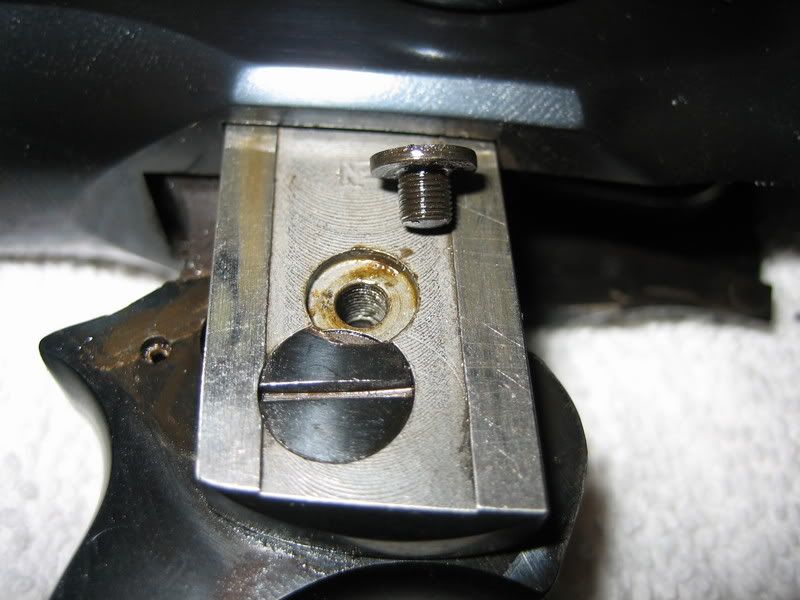
Remove the small screw on the bottom tang that holds the block that holds the bottom of the main spring in place #70228 This will free the mainspring assembly.
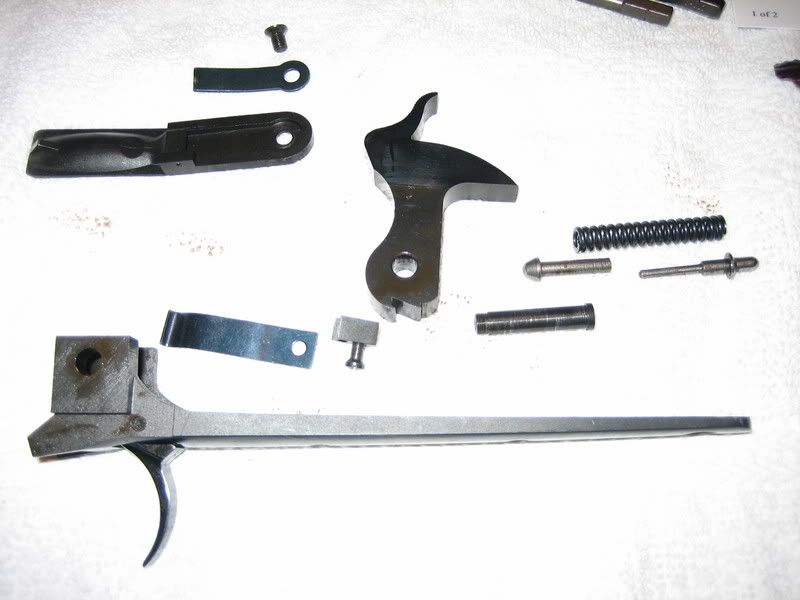
Remove the receiver/hammer screw #70155 and slide the lower tang to the rear, remove hammer and parts at the same time.
Remove the carrier stop #70038 and screw.
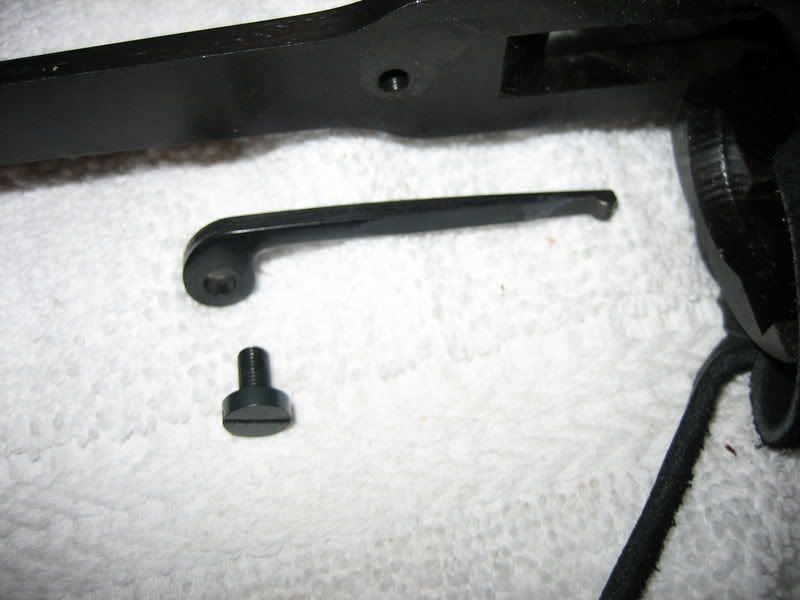
Remove finger lever lock screw and bushing #70172 and #70168
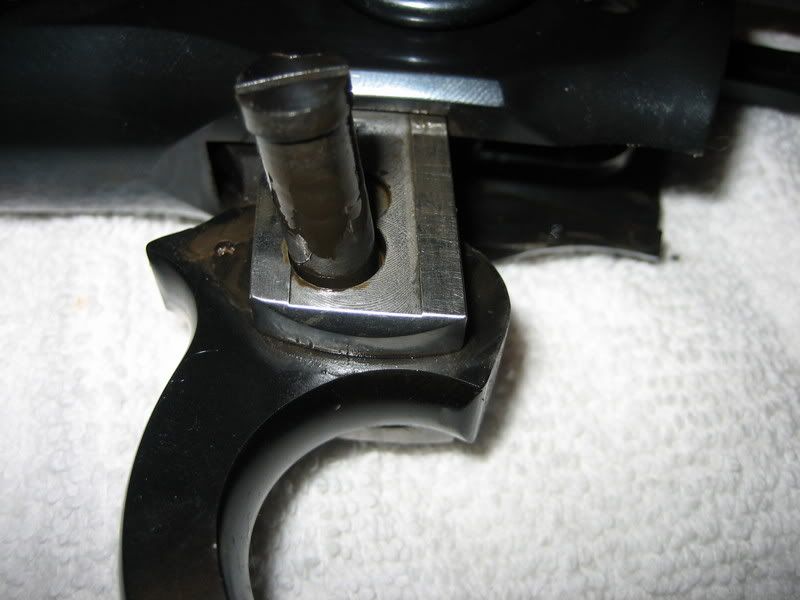
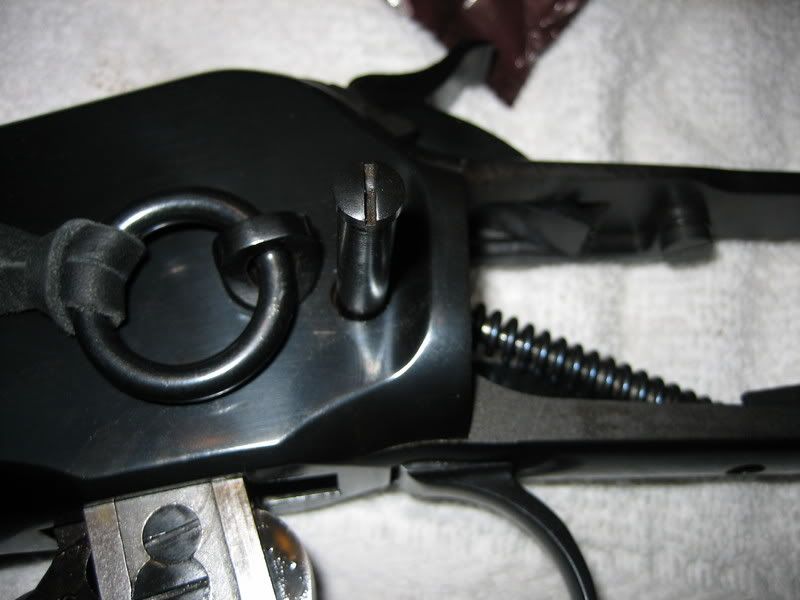
Remove left locking bolt, the right locking bolt can be freed by pushing the right cartridge guide #70048 down and out of the way.
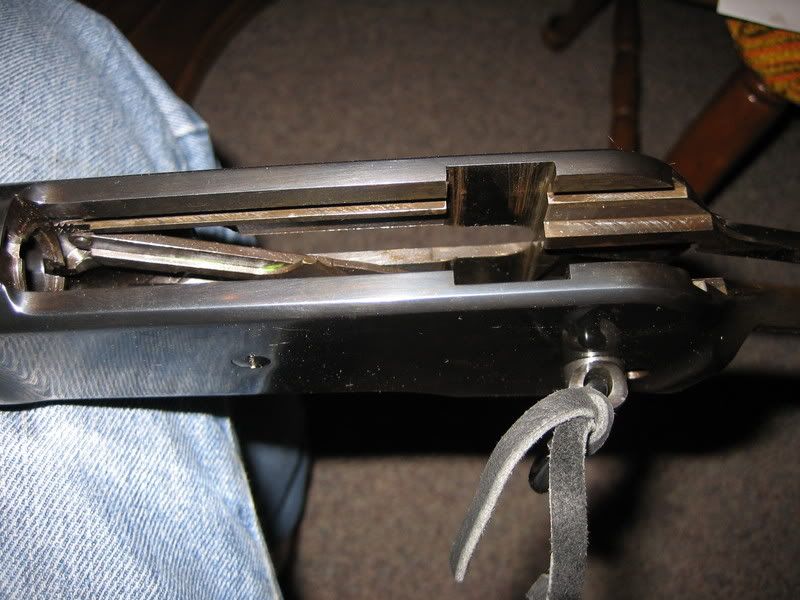
Lower the finger lever and back the breach block/bolt toward the rear to expose the lever breach block pin #70084 Remove pin left to right using a punch.
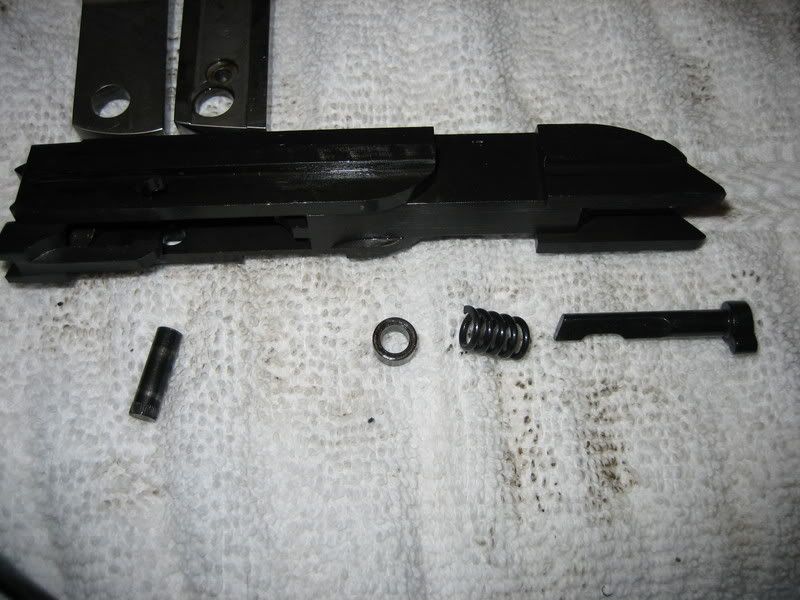
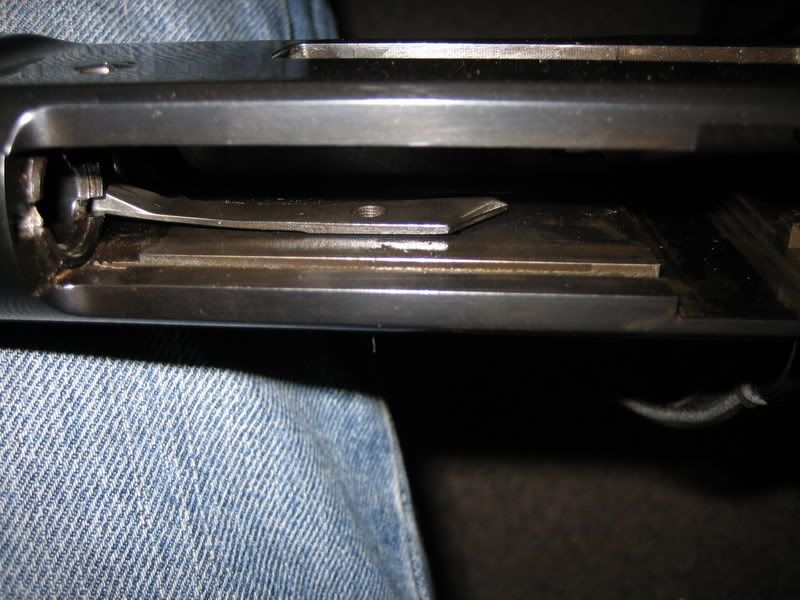
Remove breachblock assembly to the rear and watch out for the ejector, spring and cup, they will fall out.
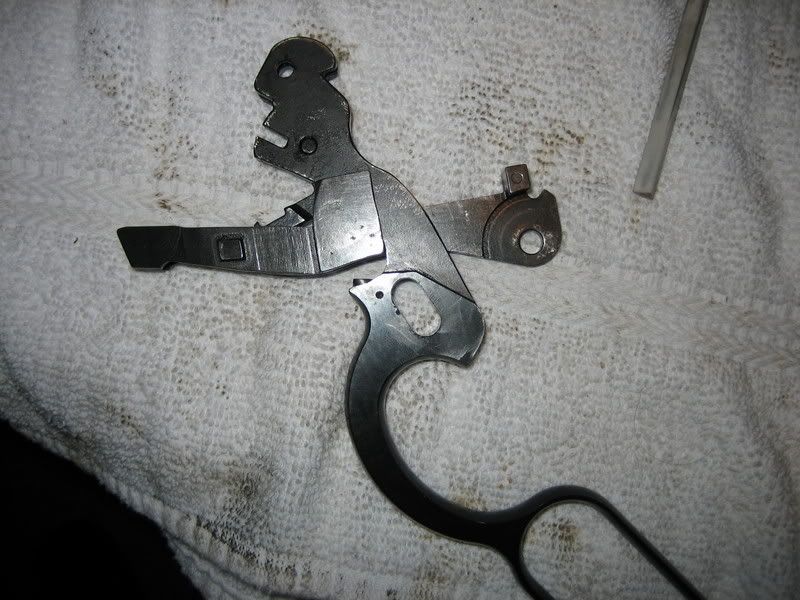
Also pay close attention to the interlocked parts of the finger lever, carrier #70032 and carrier hook #70035 They will fall out too!
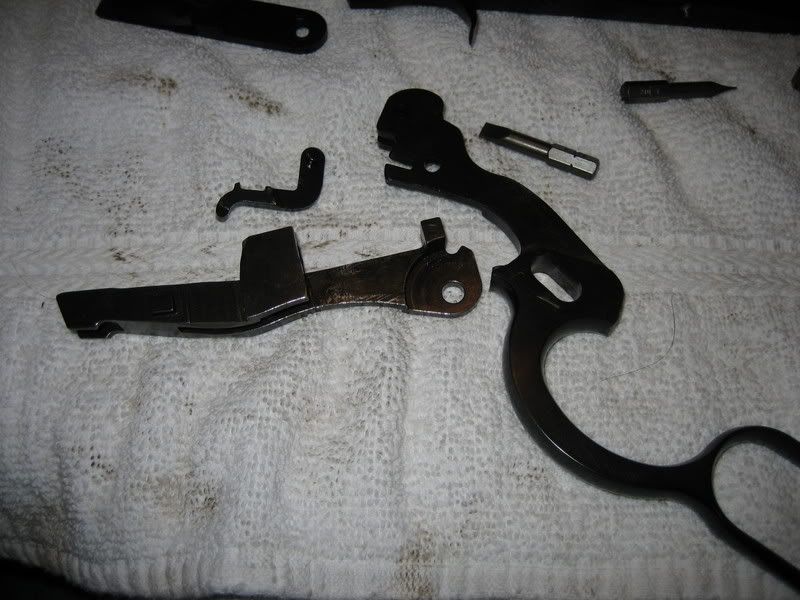
I did not remove the cartridge stop #70056 on the left side of the receiver or the right cartridge guide #70048 I did not see any reason to remove these, it is just two screws if you must.
Well that is the EASY PART!
If your going to tune your 1886 up this would be the time to do it following the link above.
Some notes as far as the tune up goes. The only spring I modified was the hammer spring, I removed approximately 1.5 coils is all. In addition I polished the sear and adjusted the sear notch height on the hammer to get rid of a lot of trigger creep. The trigger on my 1886 was very heavy +6 pounds and creepy, it now brakes clean at 3.5 lbs. I may remove .5 coil more after shooting it a wile.
This is were I say “Reassemble in reverse order”
That would not be fair, the 1886 proved to be the Rubik's Cube of firearms!
While reassembling in reverse order is correct, a few tips will make it easier.
The finger lever, carrier and carrier hook all go into the receiver at one time, then you have to install the breachblock. I ended up installing the carrier hook after the breachblock, it kept falling out so I decided to try installing it after and it worked, it has to be set and spun into place and it worked slick. Use a pair of hemostats and access through the loading gate opening. Positioning the carrier hook correctly is the only trick to it, when you spin it into place. Also the breachblock installation is tricky, you must push in the ejector and the firing pin at the same time to create room for the installation of the breachblock pin, otherwise the ejector and firing pin will not be “Trapped” in the breachblock.
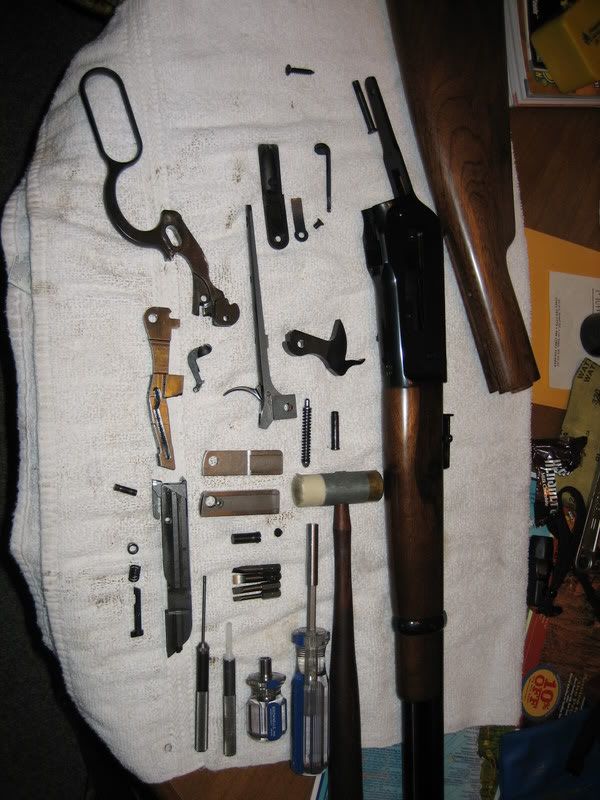
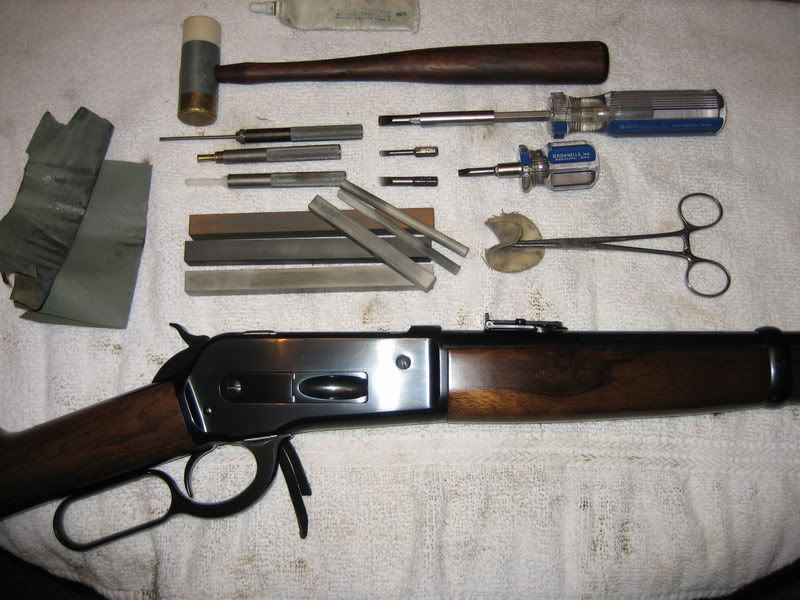
Here are all the tools needed to accomplish the task.
I hope this gives a few of you the information needed to tackle your 1886 or Model 71.
Range report to follow!
Scott
Browning 1886 & Model 71 - Disassembly & Tune Up
I search the web for any information on disassembly procedures for the 1886 or Model 71 for that matter, seems to be some kind of taboo to take one of these apart.
I figured I would do it and share my experience and pictures for others that may want to tackle this job!
I practiced on my Puma 92 first, the little brother of the 1886 so I could get 100% familiar with the workings of the 92 action, it is similar and much simpler than the 1886, plus there is plenty of how too’s on the web for guidance. The nice thing about practicing is the slick action my 92 has now.
Great information on the 92 can be found at Marauders web site and I thank all that contributed to the information found there.
http://marauder.homestead.com/Rifles.html
This checklist was partially used on both the 92 and 1886.
http://marauder.homestead.com/files/Rossitune.htm
Here is the Puma 92 in .357 that so graciously donated itself to the cause.
Well lets get started!
By the way, MAKE SURE THE GUN IS UNLOADED.
Study the diagram and get familiar with the workings. I will be referring to the part numbers when needed.
Remove the butt stock by removing the upper and lower tang screws, then slide the stock off to the rear.
Remove the loading gate spring cover and screw.
Remove the small screw on the bottom tang that holds the block that holds the bottom of the main spring in place #70228 This will free the mainspring assembly.
Remove the receiver/hammer screw #70155 and slide the lower tang to the rear, remove hammer and parts at the same time.
Remove the carrier stop #70038 and screw.
Remove finger lever lock screw and bushing #70172 and #70168
Remove left locking bolt, the right locking bolt can be freed by pushing the right cartridge guide #70048 down and out of the way.
Lower the finger lever and back the breach block/bolt toward the rear to expose the lever breach block pin #70084 Remove pin left to right using a punch.
Remove breachblock assembly to the rear and watch out for the ejector, spring and cup, they will fall out.
Also pay close attention to the interlocked parts of the finger lever, carrier #70032 and carrier hook #70035 They will fall out too!
I did not remove the cartridge stop #70056 on the left side of the receiver or the right cartridge guide #70048 I did not see any reason to remove these, it is just two screws if you must.
Well that is the EASY PART!
If your going to tune your 1886 up this would be the time to do it following the link above.
Some notes as far as the tune up goes. The only spring I modified was the hammer spring, I removed approximately 1.5 coils is all. In addition I polished the sear and adjusted the sear notch height on the hammer to get rid of a lot of trigger creep. The trigger on my 1886 was very heavy +6 pounds and creepy, it now brakes clean at 3.5 lbs. I may remove .5 coil more after shooting it a wile.
This is were I say “Reassemble in reverse order”
That would not be fair, the 1886 proved to be the Rubik's Cube of firearms!
While reassembling in reverse order is correct, a few tips will make it easier.
The finger lever, carrier and carrier hook all go into the receiver at one time, then you have to install the breachblock. I ended up installing the carrier hook after the breachblock, it kept falling out so I decided to try installing it after and it worked, it has to be set and spun into place and it worked slick. Use a pair of hemostats and access through the loading gate opening. Positioning the carrier hook correctly is the only trick to it, when you spin it into place. Also the breachblock installation is tricky, you must push in the ejector and the firing pin at the same time to create room for the installation of the breachblock pin, otherwise the ejector and firing pin will not be “Trapped” in the breachblock.
Here are all the tools needed to accomplish the task.
I hope this gives a few of you the information needed to tackle your 1886 or Model 71.
Range report to follow!
Scott
ScottS

"No arsenal, no weapon in the arsenals of the world, is so formidable as the will and moral courage of free men and women."
-- Ronald Reagan
"No arsenal, no weapon in the arsenals of the world, is so formidable as the will and moral courage of free men and women."
-- Ronald Reagan
Re: Browning 1886 Disassembly
Your welcome, let us know how it goes.
ScottS
"No arsenal, no weapon in the arsenals of the world, is so formidable as the will and moral courage of free men and women."
-- Ronald Reagan
"No arsenal, no weapon in the arsenals of the world, is so formidable as the will and moral courage of free men and women."
-- Ronald Reagan

-
twoguns

- Levergunner 1.0
- Posts: 57
- Joined: Mon Jan 18, 2010 12:45 pm
- Location: Pagosa Springs, CO
- Contact:
Re: Browning 1886 Disassembly
salvo wrote: Also the breachblock installation is tricky, you must push in the ejector and the firing pin at the same time to create room for the installation of the breachblock pin, otherwise the ejector and firing pin will not be “Trapped” in the breachblock.
I have been working on my 1886 a lot lately and I found that the trick to getting the breachblock pin back in easily (called the ejector stop pin P070084 on the Browning parts drawing) Is to lay the rifle on its right side on your workbench pad or blanket, then:
-start the pin with the smooth end (not the splined end) in the right side of the breech bolt
-place a small block of wood under the splined end of the pin and as you push in on both the extractor and firing pin at the same time apply a little downward pressure on the breech bolt until the pin slides through the ejector cut, through the firing pin cut, and up to the hole on the left side of the breech bolt. (you can see these cuts move out of the way as you press them and look through the hole)
-then turn over the rifle carefully and place the wood block under the breech bolt and tap the pin the rest of the way engaging the splined section into the holes on the right side of the breech bolt.
Ken
A man on a gallopin' horse in the middle of the night would never know the difference.
Re: Browning 1886 Disassembly
Any tips for getting the hammer, trigger, tang, strut, and mainspring all back together? It doesn't appear there's any way to compress the mainspring like with the Miroku's.
One other question regarding the two pieces of the hammer strut: In my rifle, the large cone-shaped end fit up against the tang stop, and the smaller-diameter piece fit against the hammer, with the longer end of the smaller diameter piece fitting inside the larger diameter piece. In the schematic, the large end goes agains the tang and the smaller end against the hammer, but the SHORTER end of the smaller diameter piece fits inside the larger diameter piece. In your photos of the disassembled pieces, it looks like maybe you have the smaller diameter end going against the tang, and the larger diameter end going against the hammer. Do you know for sure which is correct?
Thanks!
Hawkins
Re: Browning 1886 Disassembly
Good catch on the schematic, it looks to be all wrong. The long skinny end goes into the other larger end, and the larger end goes to the hammer. To compress the spring you assemble every thing but the hammer screw and compress the spring by pushing the hammer into place wile inserting the hammer screw.
I'm going from memory and can pull the butt stock off and give it a quick check if you like.
I'm going from memory and can pull the butt stock off and give it a quick check if you like.
ScottS
"No arsenal, no weapon in the arsenals of the world, is so formidable as the will and moral courage of free men and women."
-- Ronald Reagan
"No arsenal, no weapon in the arsenals of the world, is so formidable as the will and moral courage of free men and women."
-- Ronald Reagan