Holster tutorial, Part3

Welcome to the Leverguns.Com Forum. This is a high-class place so act respectable. We discuss most anything here ... politely.

Moderators: AmBraCol, Hobie

Forum rules
Welcome to the Leverguns.Com General Discussions Forum. This is a high-class place so act respectable. We discuss most anything here other than politics... politely.

Please post political post in the new Politics forum.
Post Reply
User avatar
kimwcook
Advanced Levergunner
Posts: 7978
Joined: Tue Sep 04, 2007 10:01 pm
Location: Soap Lake, WA., U.S.A.

Holster tutorial, Part3

Post by kimwcook »

Here we go, part 3. Everyone got their popcorn?

In one of the previous posts I said I'd get a picture of the groover I use. Here it is. There's a small hole in the rod with the 90 degree bend. That's what does the cutting. The string like thing in the picture is the piece that gets cut out.
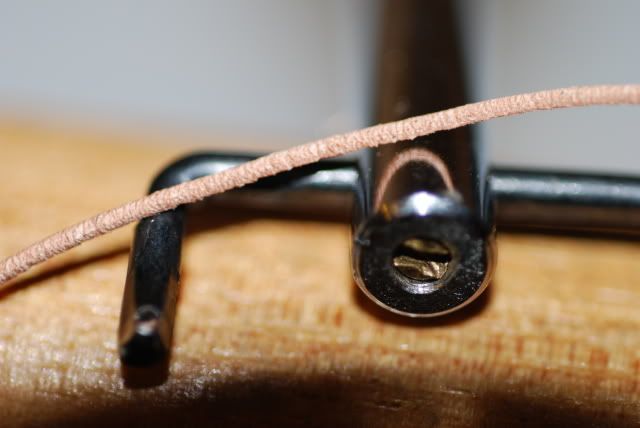
Image

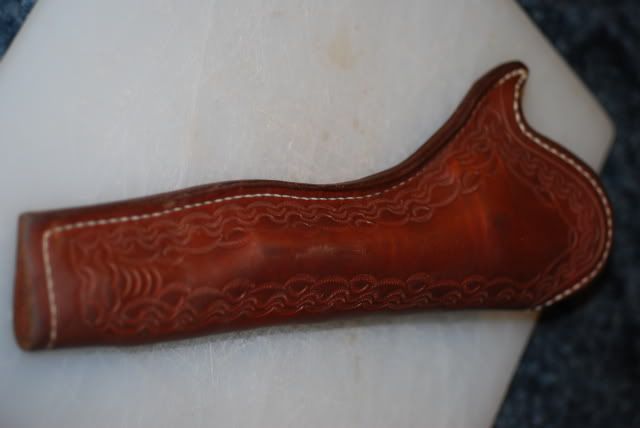
There was also talk about folding the rear portion of the holster half down to make the belt loop. Here's one I did that with, but it's a straight hang style. Front view.
Image

Back view.
Image

Shot of the belt loop from the top.
Image

Okay here we go with tonights installment.

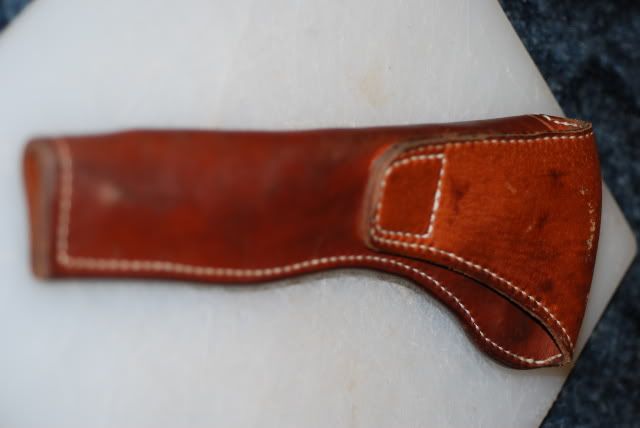
Here's the dried cut out that I wet and stamped last night. I have a forced air HVAC system so it's real convenient to place my went projects on top of a register and it dries it fairly quickly without a bunch of heat. Heat is a bad no, no. You want it to dry slow and controlled.
Image

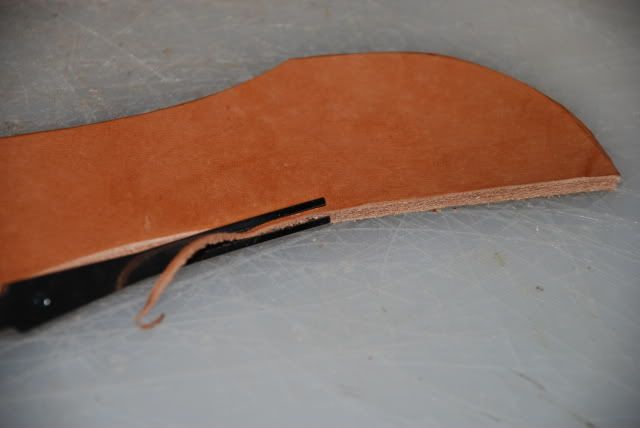
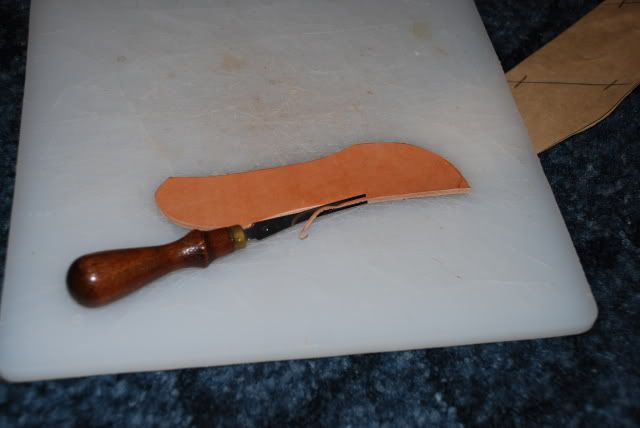
Here's the belt loop. I used the pattern I made, just like the holster and did the same thing, trace and cut.
Image

Next, I edge the belt loop with an edger. This one is a number 3. The lower the number the smaller, vice versa. Edgers are used to give a round smooth edge to your edges (duh). You'll be edging both sides of the piece. Keep the edger sharp and at about a 45 degree angle to the edge your cutting. Go around the whole piece and then flip it over and do the same thing to the other side.
Image

Close up of the edging process.
Image

Once the piece is edged on both sides it's time to smooth it. Using some type of slicker. Here are the three I use. One can use gum tragacanth on the edge, but I find water works well for me. From the left, a 1" wooden dowel, a plastic slicker and a sambar stag roll.
Image

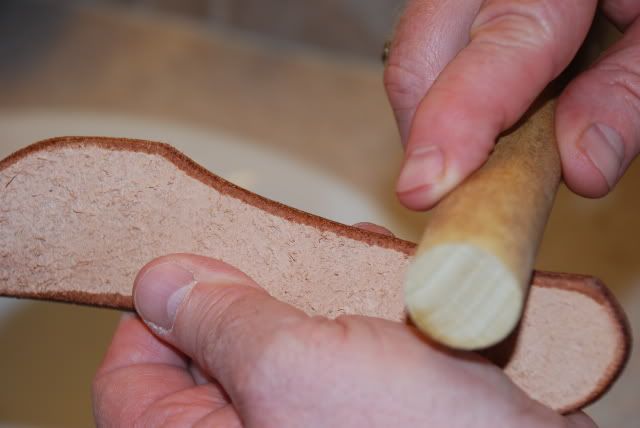
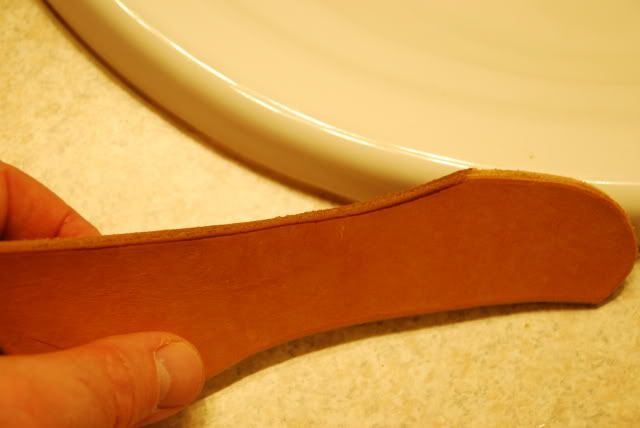
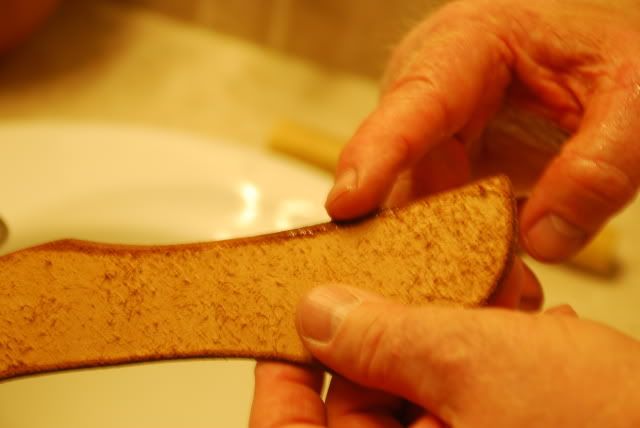
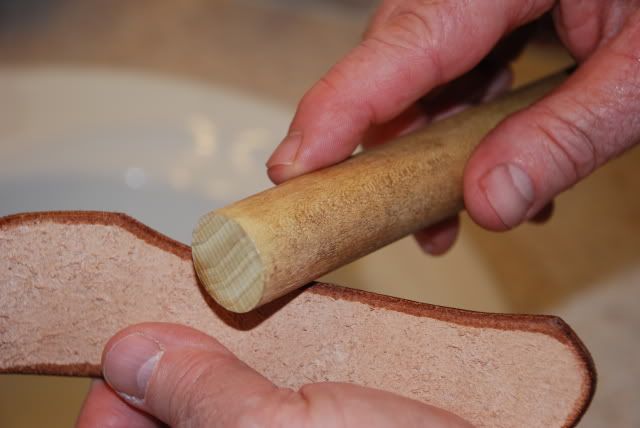
I take the piece I've edged and run a little water around the outside edge. Not to much, just enough to get it wet. And then I start running the dowel back and forth over the edge. This takes a little getting used to, but it's easy. It just takes a little practice.
Image

Image

Holding the piece and running the dowel back and forth.
Image

Image

A picture showing the holster edge which hasn't been edged or slicked yet and the belt loop which has.
Image

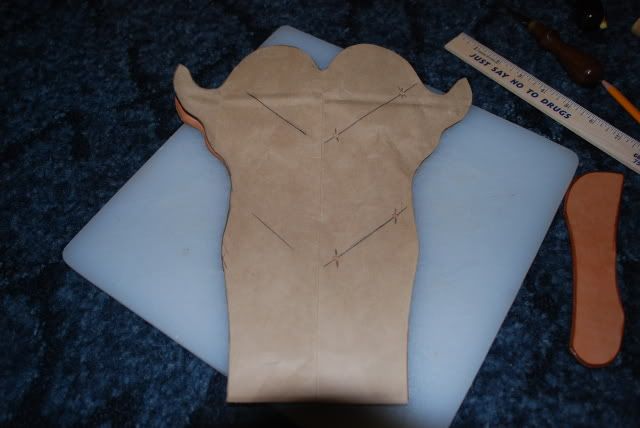
Now that the belt loop is edged and slicked it's time to locate where I want it on the back of the holster. I used a punch and punched four holes at the ends of my holster pattern where I'd made the lines to locate it earlier. I placed it on the holster and made four marks at the ends of the two lines.
Image

Then I laid the holster pattern back on the holster leather and made a mark at each of the four holes.
Image

I then laid the belt loop on the holster and drew a pencil line around the ends that are going to be glued and sewn to the holster.
Image

I use Barge cement and put some inside the area on the holster I drew with the pencil and on the back of the loop itself. Now, kind of important let the glue dry some, letting it dry longer is better than shorter.
Image

When the glue is dry I carefully place it inside the pencil sketch I've made of the loop on the holster and give it a little pressure to bond the two pieces together. Do this once because this stuff will almost literally pull the leather apart than separate at the seams. Then I use the groover and cut an edge for the seams like I did on the front of the holster already.
Image

Then using hole punches I punch the holes where the leather will go. Now if I had my shop I prefer to drill the marked holes, but since I don't I use the hammer punches shown here. There's different sizes and some use a marker and awl. I've never done it that way. Some day I'll have to do it and see if it's actually better or easier.
Image

Punching the holes. This again is something that isn't rocket science, because I can do it, but you'll get better the more you do it.
Image

That's all for tonight. I'd like to line the inside with some pigskin but I can't find it. I'll have to look a little harder as I'd really like the holster lined.
Old Law Dawg
User avatar
Andrew
Advanced Levergunner
Posts: 2043
Joined: Thu Sep 06, 2007 5:30 pm
Location: Southern Missouri

Re: Holster tutorial, Part3

Post by Andrew »

It's lookin' pretty good there; good work, again.
ImageImage
Qui tacet consentit. (silence implies consent)
The Boring Blog
User avatar
Borregos
Advanced Levergunner
Posts: 4756
Joined: Thu Sep 13, 2007 7:40 am
Location: Ontario, Canada

Re: Holster tutorial, Part3

Post by Borregos »

Really interesting, thanks again :D
Pete
Sometimes I wonder if it is worthwhile gnawing through the leather straps to get up in the morning..................
Pete44ru
Advanced Levergunner
Posts: 11242
Joined: Sun Sep 02, 2007 7:26 am

Re: Holster tutorial, Part3

Post by Pete44ru »

Nice pics.

I burnish the edges after I sew my holster completely together - using a smooth, hard tool similar to those you pictured, and raw egg white.
Don't use too much pressure when burnishing, or you'll roll the edge of the leather, causing a high rim around the edges.

BTW - After sewing any two edges together, if they don't come out exactly even (like maybe you had a few beers B 4 cutting the line) - smooth/even them up via sandpapering, before burnishing.

.
User avatar
kimwcook
Advanced Levergunner
Posts: 7978
Joined: Tue Sep 04, 2007 10:01 pm
Location: Soap Lake, WA., U.S.A.

Re: Holster tutorial, Part3

Post by kimwcook »

As a general rule I leave my edges just a little proud as I can never seem to get them to line up perfectly. So after I sew the edges together I take a small cutting to give it a nice straight parallel ending before I use the edger.

Once I get my shop set up I'll probably burnish my edges using a felt buffer and some type of edging compound alloyed with beeswax. I just don't get that professional edge, like John Bianchi, doing it by hand. It's close, but not the same.

When I did have access to my last shop, I'd use my 2"X72" belt grinder with a fresh 60 grit belt to even the edges up. That went real fast, but you have to be careful as the belt will load up with leather and start burning the edge. Smells awful too.
Old Law Dawg
User avatar
Buck Elliott
Member Emeritus
Posts: 2830
Joined: Mon Sep 10, 2007 12:15 pm
Location: Halfway up Sheep Mountain -- Cody, Wyoming

Re: Holster tutorial, Part3

Post by Buck Elliott »

An overstitch wheel to mark with, and an awl to poke holes with and a llooonggg ( at least 6 - 10 ft ) waxed linen or poly thread ( 4- or 6-cord ) with a needle at each end will give you the best, tightest, prettiest stitches.

80 grit belt on a sander to even the edged; 120 grit to smooth, then edge again and use Gum Tragacanth and a good, grooved slicker to burnish the edges. The gum gives a more durable edge finish than plain water. Some use glycerine soap and a piece of rough canvas to burnish...

Lotsa ways to skin a cat.
Regards

Buck

Life has a way of making the foreseeable that which never happens, and the unforeseeable, that which your life becomes...
User avatar
Hobie
Moderator
Posts: 13903
Joined: Sat Mar 31, 2007 1:54 pm
Location: Staunton, VA, USA
Contact:

Re: Holster tutorial, Part3

Post by Hobie »

You make me wish I'd bought my dad's leatherworking stuff. Mike bought it but I'm sure his widow moved it on, one way or another, soon after he died.
Sincerely,

Hobie

"We are all travelers in the wilderness of this world, and the best that we find in our travels is an honest friend." Robert Louis Stevenson
User avatar
Grizz
Advanced Levergunner
Posts: 12854
Joined: Fri Aug 31, 2007 7:15 pm

Re: Holster tutorial, Part3

Post by Grizz »

can anyone share any URLs for buying leather craft tools and supplies?

thanks

finally, something else I can screw up in my own style :lol:
Hagler
Senior Levergunner
Posts: 1523
Joined: Sun Apr 15, 2007 12:52 am
Location: Leverland, U.S.A.
Contact:

Re: Holster tutorial, Part3

Post by Hagler »

Grizz,

http://www.tandyleatherfactory.com

Almost all of the other companies' merchandise is exactly the same as Tandy's stuff. I mean mainly tools, like stamps, conchos, edging, etc., are the same as Tandy's.

Unless you are working with upholstery, you will want to buy "vegetable-tanned" leather. Holsters are usually made from 8-to-9-ounce leather. Thicker leather can be used, but it will be a chore to handle. Saddle skirting is tough. It is good for scabbards, in the 13-to-15-ounce range, but it will easily dull you knife, as you cut it. :wink:

Shawn
Last edited by Hagler on Sat Dec 06, 2008 3:52 am, edited 1 time in total.
"That's right, Billy, I'm good with it. I hit what I shoot at, and I'm fast!"-Lucas McCain, c1882.
ImageImage
User avatar
kimwcook
Advanced Levergunner
Posts: 7978
Joined: Tue Sep 04, 2007 10:01 pm
Location: Soap Lake, WA., U.S.A.

Re: Holster tutorial, Part3

Post by kimwcook »

With all the talent on this forum I don't know why I'm the one doing the tutorial. Pete44ru, Hagler, Buck Elliot, geez. I'm feeling some pressure.

We could have more than one ya know.
Old Law Dawg
JerryB
Advanced Levergunner
Posts: 5492
Joined: Mon Apr 02, 2007 9:23 pm
Location: Batesville,Arkansas

Re: Holster tutorial, Part3

Post by JerryB »

I reckon you are the one that took the time to do it for us, thanks.
JerryB II Corinthians 3:17, Now the Lord is that Spirit: and where the Spirit of the Lord is, there is liberty.

JOSHUA 24:15
Mutt
Levergunner 3.0
Posts: 502
Joined: Sun Sep 09, 2007 6:58 pm
Location: South Coastal Texas

Re: Holster tutorial, Part3

Post by Mutt »

I have several books on leather work. Pattern making is just shown almost the same as you did . I see some of your bought tools are extra quality ones. they aren't cheap , but like anything else you get what you pay for. But you'll find that some home made ones will fit your needs just right also. I have made several western holsters for friends as well as my wife & myself. Plus the advise you have given is right on .
I too like Tandy for most of my needs . They even have things to know sometimes on the edges of their catalog . Their sales rags are good savings too.
I have never considered going into business though, not good enough . Ol' Ridis brothers keep my hands from doing much now a-days . But it's fun to do.
Just try not to get in a hurry as you work. I still have a few needle scars left.
Most of all have fun ....................Mutt
P.S.
Unable to show any pics at this time. My beautiful young wife usually does that for me , Not savy on the small screen.
She is working on some health paper work . Girls like this just don't fall off trees. I'm blessed
:D
............................................................................Mutt.....................
User avatar
kimwcook
Advanced Levergunner
Posts: 7978
Joined: Tue Sep 04, 2007 10:01 pm
Location: Soap Lake, WA., U.S.A.

Re: Holster tutorial, Part3

Post by kimwcook »

Thanks everybody for your encouraging words. This tutorial is just a quick sight into my way of making a holster. It isn't the only way, or maybe not the right way, just my way. I've purposely left out a lot of the alternate ways of doing things because I didn't want it to turn into a long drawn out affair. Just a quick insight into making a holster.

That being said, I'd like to see some of the other guys' work. I love looking at leather, anybody's leather. I learn a lot that way. And, it sounds like there's a lot of experience far beyond mine making a holster. Personally, I'd love to see it and learn something.
Old Law Dawg
User avatar
marlinman93
Advanced Levergunner
Posts: 7066
Joined: Sun Apr 01, 2007 3:40 pm
Location: Oregon

Re: Holster tutorial, Part3

Post by marlinman93 »

kimwcook,
This is one of the most interesting and informative posts I've ever seen on this forum! I can't thank you enough for taking the time to educate and entertain us with such a fine tutorial!-Vall
Pre WWI Marlins and Singleshot rifles!
http://members.tripod.com/~OregonArmsCollectors/
Chuck 100 yd
Advanced Levergunner
Posts: 6972
Joined: Tue Apr 03, 2007 8:52 pm
Location: Ridgefield WA. USA

Re: Holster tutorial, Part3

Post by Chuck 100 yd »

What marlinman93 said +1 :D Thanks!!
20cows
Advanced Levergunner
Posts: 2278
Joined: Tue Apr 03, 2007 9:55 pm
Location: East West Texas

Re: Holster tutorial, Part3

Post by 20cows »

With all the talent on this forum I don't know why I'm the one doing the tutorial.
Keep going, it's good!
JerryB
Advanced Levergunner
Posts: 5492
Joined: Mon Apr 02, 2007 9:23 pm
Location: Batesville,Arkansas

Re: Holster tutorial, Part3

Post by JerryB »

I think 20cows has talked some about a single or double loop holster. I would like to try one for my old Colt.45 SAA.
JerryB II Corinthians 3:17, Now the Lord is that Spirit: and where the Spirit of the Lord is, there is liberty.

JOSHUA 24:15
awp101
Advanced Levergunner
Posts: 5672
Joined: Mon Apr 09, 2007 7:13 pm
Location: DeeDee Snavely's Used Guns and Weapons

Re: Holster tutorial, Part3

Post by awp101 »

kimwcook, I think you're doing great! Like you said, there's more than one way to do things. I can take what you've shown once I get started and see how it works for me!Image

Now then, how would this work rather than the hole punches you picture?
Image
http://www.tandyleatherfactory.com/prod ... er=8091-00
I already have one of thse but haven't used it yet.

Also other than the amount of adjustment between the two, do you know if there's a difference between the Craftool E-Z Adjust Stitching Groover http://www.tandyleatherfactory.com/prod ... er=8069-00 and the Craftool Adjustable Groover http://www.tandyleatherfactory.com/prod ... er=8074-00 ?
If these walls could talk, I'd listen to the floor.
Pete44ru
Advanced Levergunner
Posts: 11242
Joined: Sun Sep 02, 2007 7:26 am

Re: Holster tutorial, Part3

Post by Pete44ru »

awp101 - You might want to follow the K.I.S.S. principle, at least at first.
You could simply use a ruler or tape measure to lay out a line of penciled dots about 1/8" or so apart, then lay the leather (finished side up) on a wooden block and hammer-punch the holes (on the dots) with a 1/16" tip, square-shouldered drift pin. The waxed thread, referred to above, will slide right on thru.

kimwcook - I, too, think it's wonderful of you to take the time for the photography - and the pics are waaaaay out of my league, that's fer sure !

Thanks, for a great job ! I just hope ya don't mind me tossin' in $0.02 , every now & then.

.
awp101
Advanced Levergunner
Posts: 5672
Joined: Mon Apr 09, 2007 7:13 pm
Location: DeeDee Snavely's Used Guns and Weapons

Re: Holster tutorial, Part3

Post by awp101 »

Pete44ru wrote:awp101 - You might want to follow the K.I.S.S. principle, at least at first.
You could simply use a ruler or tape measure to lay out a line of penciled dots about 1/8" or so apart, then lay the leather (finished side up) on a wooden block and hammer-punch the holes (on the dots) with a 1/16" tip, square-shouldered drift pin. The waxed thread, referred to above, will slide right on thru.
True, but I already have the rolly thingy... :lol: Bought some more tooling a couple of weekends ago when I decided to make the pouch for Dad's multi-tool.

One thing I love about this hobby is the chance to buy more tools! :lol:
If these walls could talk, I'd listen to the floor.
User avatar
kimwcook
Advanced Levergunner
Posts: 7978
Joined: Tue Sep 04, 2007 10:01 pm
Location: Soap Lake, WA., U.S.A.

Re: Holster tutorial, Part3

Post by kimwcook »

Awp101, the overstitch wheel you have is what's used for marking the leather when one uses an awl. I've got a couple of awls, but again, it's something I've never used or shown how. I know the principal, just haven't done it.
Old Law Dawg
awp101
Advanced Levergunner
Posts: 5672
Joined: Mon Apr 09, 2007 7:13 pm
Location: DeeDee Snavely's Used Guns and Weapons

Re: Holster tutorial, Part3

Post by awp101 »

Thanks, I guess I should look at a set of those as well. It's for the children... :lol:
If these walls could talk, I'd listen to the floor.
Post Reply